Notification

For each resource, you can specify different notification options.

Setting notification options

  1. In the Schedule section of the Notifications panel, click the resource whose options you wish to change, for instance E-mail:

    or

    If the resource is not shown, click the New schedule icon 1.15 New schedule to create the resource in the list, and then click the resource link.

    The pop-up window Edit schedule: E-mail (depending on the resource you selected) is shown.

    2.0 Edit schedule

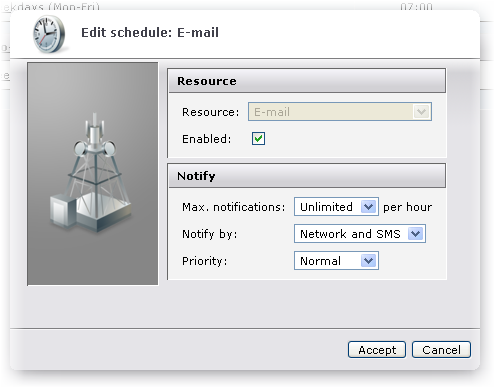
    While you are editing the schedule, the scheduled resource is disabled (not used by the scanner), and the text "[ disabled ]" is added to the resource heading, for instance E-mail [ disabled ].

  2. If you select the check box Enabled, notifications for the resource in question are enabled.

    If notification is disabled, the affected client(s) will not receive any notification of changes within the resource in question. Note that notification can be enabled or disabled at all levels (system, group, and device).

  3. In the drop-down list Max. notifications, select the maximum number of notifications you want to send to the devices per hour: 3, 5, 10, or Unlimited.

    The number of notifications per hours is calculated as a floating time window. For example: You have chosen to send a maximum of 3 notifications per hour. Say a user receives one new e-mail every 10 minutes. DME will then send a notification to the client in question according to the following table:

Time

DME server action

10:00

"New mail" notification sent to user.

10:10

"New mail" notification sent to user.

10:20

"New mail" notification sent to user.

10:30 - 11:19

No action.

11:20

"New mail" notification sent to user, telling that 6 new mails have arrived (one every ten minutes since 10:20).

This way you can save SMS traffic costs. Note that if you use network push (see below), you can safely set the value to Unlimited.

  1. In the drop-down list Notify by you can choose the mechanism to be used by DME when notifying the device about changes. You can choose between the following options:

    For more information about adaptive push over the network, see Appendix F: AdaptivePush™.

  2. In the drop-down list Priority you can set the default scan priority. The selected priority (High - Normal - Low) instructs the server how to rank mailbox scan requests on the server. These requests can be seen in the Clients section of the Notification panel - see Clients.
  3. Click Accept to save the changes to the notification schedule.

Next topic

Setting the scheme